


一 声明式服务调用
1.1 Spring Cloud Feign
Feign是Netflix开发的声明式、模板化的HTTP客户端,Feign可帮助我们更加便捷、优雅地调用HTTP API。
Spring Cloud Feign在RestTemplate模板化调用接口的基础上做了进一步封装,由它来帮助我们定义和实现依赖服务接口的定义。在Spring Cloud Feign的实现下,我们只需创建一个接口并用注解的方式来配置它,即可完成对服务提供方的接口绑定,简化了在使用Spring Cloud Ribbon时自行封装服务调用客户端的开发量。
Spring Cloud Feign具有可插拔的注解支持,包括Feign注解和JAX-RS注解,同时,它在Netflix Feign的基础上扩展了对SpringMVC的注解支持。
1.2 快速入门
1.2.1 服务提供者
下面是一个简单的服务提供者,
package com.bianjf.web.controller;
import java.util.HashMap;
import java.util.Map;
import org.springframework.web.bind.annotation.PathVariable;
import org.springframework.web.bind.annotation.RequestMapping;
import org.springframework.web.bind.annotation.RequestMethod;
import org.springframework.web.bind.annotation.RestController;

@RestController
public class UserController {
    @RequestMapping(value = "/{name}/getUser", method = RequestMethod.GET)
    public Map<String, Object> getUser(@PathVariable("name") String name) {
        Map<String, Object> resultMap = new HashMap<>();
        try {
            resultMap.put("code", "0");
            resultMap.put("message", "获取成功");
            resultMap.put("userName", name);
        } catch (Exception e) {
            e.printStackTrace();
            resultMap.put("code", "1");
            resultMap.put("message", "系统错误");
        }
        return resultMap;
    }
}
源码如下
feignprovider.jar
1.2.2 服务调用端
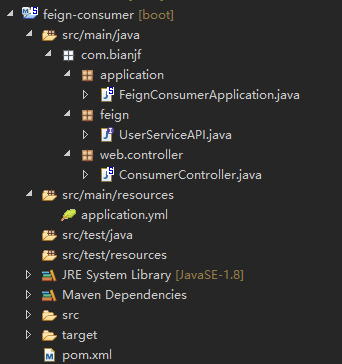
- 首先,创建一个Spring Boot基础工程,名feign-consumer。目录结构如下
需要注入spring-cloud-starter-eureka和spring-cloud-starter-feign依赖,具体pom.xml如下
<project xmlns="http://maven.apache.org/POM/4.0.0" xmlns:xsi="http://www.w3.org/2001/XMLSchema-instance"
    xsi:schemaLocation="http://maven.apache.org/POM/4.0.0http://maven.apache.org/xsd/maven-4.0.0.xsd">
    <modelVersion>4.0.0</modelVersion>
    <groupId>com.bianjf</groupId>
    <artifactId>feign-consumer</artifactId>
    <version>0.0.1-SNAPSHOT</version>
    <parent>
         <groupId>org.springframework.boot</groupId>
         <artifactId>spring-boot-starter-parent</artifactId>
         <version>1.5.10.RELEASE</version>
    </parent>
    <properties>
         <project.build.sourceEncoding>UTF-8</project.build.sourceEncoding>
         <project.reporting.outputEncoding>UTF-8</project.reporting.outputEncoding>
         <java.version>1.8</java.version>
         <spring-cloud.version>Dalston.SR5</spring-cloud.version>
    </properties>
    <dependencyManagement>
         <dependencies>
             <!-- Spring Cloud Start -->
             <dependency>
                 <groupId>org.springframework.cloud</groupId>
                 <artifactId>spring-cloud-dependencies</artifactId>
                 <version>${spring-cloud.version}</version>
                 <type>pom</type>
                 <scope>import</scope>
             </dependency>
             <!-- Spring Cloud End -->
         </dependencies>
    </dependencyManagement>
    <dependencies>
         <!-- Spring Boot Start -->
         <!-- Spring Boot Web Start -->
         <dependency>
             <groupId>org.springframework.boot</groupId>
             <artifactId>spring-boot-starter-web</artifactId>
         </dependency>
         <!-- Spring Boot Web End -->
         <!-- Spring Boot Test Start -->
         <dependency>
             <groupId>org.springframework.boot</groupId>
             <artifactId>spring-boot-starter-test</artifactId>
         </dependency>
         <!-- Spring Boot Test End -->
         <!-- Spring Boot Actuator Start -->
         <dependency>
             <groupId>org.springframework.boot</groupId>
             <artifactId>spring-boot-starter-actuator</artifactId>
         </dependency>
         <!-- Spring Boot Actuator End -->
         <!-- Spring Boot End -->
         <!-- Spring Cloud Eureka Client Start -->
         <dependency>
             <groupId>org.springframework.cloud</groupId>
             <artifactId>spring-cloud-starter-eureka</artifactId>
         </dependency>
         <!-- Spring Cloud Eureka Client End -->
         <!-- Spring Cloud Feign Start -->
         <dependency>
             <groupId>org.springframework.cloud</groupId>
             <artifactId>spring-cloud-starter-feign</artifactId>
         </dependency>
         <!-- Spring Cloud Feign End -->
    </dependencies>
    <build>
         <plugins>
             <!-- Spring Boot启动插件 Start -->
             <plugin>
                 <groupId>org.springframework.boot</groupId>
                 <artifactId>spring-boot-maven-plugin</artifactId>
             </plugin>
             <!-- Spring Boot启动插件 End -->
             <!-- 编译工具 Start -->
             <plugin>
                 <groupId>org.apache.maven.plugins</groupId>
                 <artifactId>maven-compiler-plugin</artifactId>
                 <configuration>
                      <source>1.8</source>
                      <target>1.8</target>
                      <encoding>UTF-8</encoding>
                 </configuration>
             </plugin>
             <!-- 编译工具 End -->
             <!-- Maven Install 跳过Test阶段 Start -->
             <plugin>
                 <groupId>org.apache.maven.plugins</groupId>
                 <artifactId>maven-surefire-plugin</artifactId>
                 <configuration>
                      <skip>true</skip>
                 </configuration>
             </plugin>
             <!-- Maven Install 跳过Test阶段 End -->
         </plugins>
    </build>
</project>
- 创建应用主类FeignConsumerApplication,并通过@EnableFeignClients注解开启Spring Cloud Feign的支持功能
package com.bianjf.application;
import org.springframework.boot.SpringApplication;
import org.springframework.boot.autoconfigure.SpringBootApplication;
import org.springframework.cloud.client.discovery.EnableDiscoveryClient;
import org.springframework.cloud.netflix.feign.EnableFeignClients;
import org.springframework.context.annotation.ComponentScan;

@ComponentScan(basePackages = {"com.bianjf"})//扫描其他包的注解,将其放入Spring的IoC容器
@EnableDiscoveryClient//开启Eureka服务发现
@EnableFeignClients(basePackages = {"com.bianjf.feign"})//开启Spring Cloud Feign功能
@SpringBootApplication
public class FeignConsumerApplication {
    public static void main(String[] args) {
        SpringApplication.run(FeignConsumerApplication.class, args);
    }
}
- 定义UserServiceAPI接口,通过@FeignClient注解指定服务名来绑定服务,然后再使用Spring MVC的注解绑定具体该服务提供的REST接口。即该接口的定义与服务提供方的定义一定要是一模一样的
package com.bianjf.feign;
import java.util.Map;
import org.springframework.cloud.netflix.feign.FeignClient;
import org.springframework.web.bind.annotation.PathVariable;
import org.springframework.web.bind.annotation.RequestMapping;
import org.springframework.web.bind.annotation.RequestMethod;

@FeignClient(name = "FEIGN-PROVIDER")
public interface UserServiceAPI {
    @RequestMapping(value = "/{name}/getUser", method = RequestMethod.GET)
    public Map<String, Object> getUser(@PathVariable("name") String name);
}
注意:这里服务名不区分大小写。
- 接着,创建一个ConsumerController来实现对Feign客户端的调用。使用@Autowired直接注入上面定义的UserServiceAPI实例,并在相应的业务里面发起接口调用
package com.bianjf.web.controller;
import java.util.HashMap;
import java.util.Map;
import org.springframework.beans.factory.annotation.Autowired;
import org.springframework.web.bind.annotation.RequestMapping;
import org.springframework.web.bind.annotation.RequestMethod;
import org.springframework.web.bind.annotation.RequestParam;
import org.springframework.web.bind.annotation.RestController;

import com.bianjf.feign.UserServiceAPI;

@RestController
public class ConsumerController {
    @Autowired
    private UserServiceAPI userService;

    @RequestMapping(value = "/getUserInfo", method = RequestMethod.GET)
    public Map<String, Object> getUserInfo(@RequestParam("name") String name) {
        Map<String, Object> resultMap = new HashMap<>();
        try {
            resultMap = this.userService.getUser(name);
        } catch (Exception e) {
            e.printStackTrace();
            resultMap.put("code", "1");
            resultMap.put("message", "系统错误");
        }
        return resultMap;
    }
}
- 最后,进行相关的配置
server:
  port: 8091
spring:
  application:
    name: feign-consumer
eureka:
  instance:
    #注册时使用IP地址而不是主机名
    prefer-ip-address: true
    #Eureka Client向Eureka Server使用真实IP后,显示真实的IP地址和端口号
    instance-id: ${spring.cloud.client.ipAddress}:${server.port}
  client:
    service-url:
      defaultZone: http://10.0.0.1:8761/eureka,http://10.0.0.1:8762/eureka
最后可以发几次接口请求进行验证。
对于接口的参数绑定,即SpringMVC的参数绑定
1.3 继承特性
通过上面的“快速入门”实例实践,当使用SpringMVC的注解来绑定服务接口时,我们几乎完全可以从服务提供方的Controller中依靠复制操作,构建出相应的服务客户端绑定接口。
既然存在这么多复制操作,那么是否可以进一步的抽象?
在Spring Cloud Feign中,针对该问题提供了继承特性来帮助我们解决这些复制操作。
- 为了能够复用接口定义,我们首先创建一个基础的Maven工程,命名为common-api
- 在common-api中需要定义可同时复用于服务端与客户端的接口。需要使用SpringMVC的注解,所以在pom.xml中引入spring-boot-stater-web依赖,具体如下
<project xmlns="http://maven.apache.org/POM/4.0.0" xmlns:xsi="http://www.w3.org/2001/XMLSchema-instance"
    xsi:schemaLocation="http://maven.apache.org/POM/4.0.0http://maven.apache.org/xsd/maven-4.0.0.xsd">
    <modelVersion>4.0.0</modelVersion>
    <groupId>com.bianjf</groupId>
    <artifactId>common-api</artifactId>
    <version>0.0.1-SNAPSHOT</version>
    <parent>
         <groupId>org.springframework.boot</groupId>
         <artifactId>spring-boot-starter-parent</artifactId>
         <version>1.5.10.RELEASE</version>
    </parent>
    <dependencies>
         <!-- Spring Boot Web Start -->
         <dependency>
             <groupId>org.springframework.boot</groupId>
             <artifactId>spring-boot-starter-web</artifactId>
         </dependency>
         <!-- Spring Boot Web End -->
    </dependencies>
    <build>
         <plugins>
             <!-- 编译工具 Start -->
             <plugin>
                 <groupId>org.apache.maven.plugins</groupId>
                 <artifactId>maven-compiler-plugin</artifactId>
                 <configuration>
                      <source>1.8</source>
                      <target>1.8</target>
                      <encoding>UTF-8</encoding>
                 </configuration>
             </plugin>
             <!-- 编译工具 End -->
             <!-- Maven Install 跳过Test阶段 Start -->
             <plugin>
                 <groupId>org.apache.maven.plugins</groupId>
                 <artifactId>maven-surefire-plugin</artifactId>
                 <configuration>
                      <skip>true</skip>
                 </configuration>
             </plugin>
             <!-- Maven Install 跳过Test阶段 End -->
         </plugins>
    </build>
</project>
- 在common-api工程中创建UserServiceAPI接口,内容如下
package com.bianjf.common.api;
import java.util.Map;
import org.springframework.web.bind.annotation.PathVariable;
import org.springframework.web.bind.annotation.RequestMapping;
import org.springframework.web.bind.annotation.RequestMethod;

@RequestMapping("/")
public interface UserServiceAPI {
    @RequestMapping(value = "/{name}/getUser", method = RequestMethod.GET)
    public Map<String, Object> getUser(@PathVariable("name") String name);
}
- 下面对服务提供方feign-provider进行重构,在pom.xml中注入common-api节点,新增对common-api的依赖
<!-- 公共API工程 Start -->
<dependency>
    <groupId>com.bianjf</groupId>
    <artifactId>common-api</artifactId>
    <version>0.0.1-SNAPSHOT</version>
</dependency>
<!-- 公共API工程 End -->
- 修改feign-provider工程的UserController,实现UserServiceAPI接口,具体如下
package com.bianjf.web.controller;
import java.util.HashMap;
import java.util.Map;
import org.springframework.web.bind.annotation.PathVariable;
import org.springframework.web.bind.annotation.RestController;
import com.bianjf.common.api.UserServiceAPI;

@RestController
public class UserController implements UserServiceAPI {
    public Map<String, Object> getUser(@PathVariable("name") String name) {
        Map<String, Object> resultMap = new HashMap<>();
        try {
            resultMap.put("code", "0");
            resultMap.put("message", "获取成功");
            resultMap.put("userName", name);
        } catch (Exception e) {
            e.printStackTrace();
            resultMap.put("code", "1");
            resultMap.put("message", "系统错误");
        }
        return resultMap;
    }
}
通过继承的方式,在Controller中不再包含以往会定义的请求映射注解@RequestMapping,而参数的注解定义在重写的时候会自动带回来。在这个类中,除了要实现接口逻辑之外,只需要再增加@RestController注解使该类成为一个REST接口类就可以了。
- 完成服务提供者的重构,服务消费feign-consumer的pom.xml文件中,与提供者一样,新增对common-api的依赖
- 修改feign-consumer工程的UserServiceAPI名为UserService,继承common-api工程的UserServiceAPI接口,然后再添加@FeignClient注解来绑定服务,如下
package com.bianjf.feign;
import org.springframework.cloud.netflix.feign.FeignClient;
import com.bianjf.common.api.UserServiceAPI;

/**
* 继承相关的API,而无需编写任何代码
*
*/
@FeignClient(name = "FEIGN-PROVIDER")
public interface UserService extends UserServiceAPI {

}
这种方式,消费端只需要继承对应的接口,而无需编写任何代码
最后即可验证了。
具体的三个工程如下
feignprovider.zip
feignconsumer.zip
commonapi.zip
1.3.1 优点与缺点
使用Spring Cloud Feign继承特性的优点,可以将接口的定义从Controller中剥离,同时配合Maven私有仓库就可以轻易的实现接口定义的共享,实现在构建期间的接口绑定,从而有效减少服务客户端的绑定配置。
但是,这么做使用不当的话会带来副作用。由于接口在构建期间就建立起了依赖,那么接口变动就会对项目构建造成影响,可能服务提供方修改了一个接口定义,那么会直接导致客户端工程的构建失败。
所以,开发团队通过此方法来实现接口共享的话,建议在开发评审期间严格遵守面向对象的开闭原则,尽可能做好前后版本的兼容,避免不必要的维护工作量。
二 配置
2.1 Ribbon配置
由于Spring Cloud Feign的客户端负载均衡是通过Spring Cloud Ribbon实现的,所以我们可以直接通过配置Ribbon客户端的方式来自定义各个服务客户端调用的参数。
2.1.1 全局配置
全局配置的方式非常简单,我们可以直接使用 ribbon.key = value 的方式来设置Ribbon的各项默认参数。比如,修改默认的客户端调用超时时间:
ribbon.ConnectTimeout=500
ribbon.ReadTimeout=5000
2.1.2 指定服务配置
大多数情况下,我们对于服务调用的超时时间可能会根据实际服务的特性做一些调整,所以仅仅依靠默认的是不行的。在使用Spring Cloud Feign的时候,针对各个服务端进行个性化配置的方式与使用Spring Cloud Ribbon时的配置方式是一样的,都采用
<client>.ribbon.key = value
的格式进行设置。
其实这个
所以,设置对应的Ribbon参数,比如:
HELL0-SERVICE.ribbon.ConnectTimeout = 500
HELL0-SERVICE.ribbon.ReadTimeout = 2000
2.1.3 重试机制
Spring Cloud Feign默认实现了请求的重试机制,具体可以参考Spring Cloud Ribbon的重试机制介绍。
注意:Ribbon的超时与Hystrix的超时是两个概念。我们需要让Hystrix的超时时间大于Ribbon的超时时间,否则Hystrix命令超时后,该命令直接熔断,重试机制就没有任何意义了。
2.1.4 Hystrix配置
2.1.4.1 全局配置
对于Hystrix的全局配置同Spring Cloud Ribbon的全局配置一样,直接使用它默认前缀hystrix.command.default就可以进行设置,比如设置全局的超时时间:
hystrix.command.default.execution.isolation.thread.timeoutInMilliseconds=5000
在对Hystrix进行配置之前,需要feign.hystrix.enabled参数设置为true。
可以通过feign.hystrix.enabled=false来关闭Hystrix功能
2.1.4.2 禁用Hystrix
在Spring Cloud Feign中,可以通过feign.hystrix.enabled=false来关闭Hystrix功能。如果不想全局关闭Hystrix支持,而只想针对某个服务客户端关闭Hystrix支持,需要通过使用@Scope(“prototype”)注解指定的客户端配置Feign.Builder实例。如下步骤:
- 构建一个关闭的Hystrix的配置lei
@Configuration
public class DisabledHystrixConfiguration {
    @Bean
    @Scope("prototype")
    public Feign.Builder feignBuilder() {
        return Feign.builder();
    }
}
- 在指定的服务上(如HelloService)的@FeignClient注解中,通过configuration参数引入上面实现的配置
@FeignClient(name = "HELLO-SERVICE", configuration = DisabledHystrixConfiguration.class)
public interface HelloService {
    ......
}
2.1.4.3 服务降级配置
Hystrix提供的服务降级是服务容错的重要功能,但是HystrixCommand定义被封装起来,而无法通过@HystrixCommand注解的fallback参数那样来指定具体的服务降级处理方法。Spring Cloud Feign提供了另外一种简单的定义方式。
- 服务降级逻辑的实现只需要为Feign客户端定义的接口编写一个具体的接口实现类。比如UserService接口实现一个服务降级类UserServiceFallback,其中每个重写方法的实现逻辑都可以用来定义相应的服务降级逻辑,具体如下
@Component
public class UserServiceFallback implements FallbackFactory<UserService> {
    @Override
    public UserService create(Throwable throwable) {
        return new UserService() {
            @Override
            public Map<String, Object> getUser(String name) {
                Map<String, Object> resultMap = new HashMap<>();
                resultMap.put("code", "1");
                resultMap.put("message", "用户服务不可用, 请稍后再试");
                return resultMap;
            }
        }
    }
}
通过FallbackFactory接口实现,
- 在服务绑定接口UserService上,通过@FeignClient注解的fallback属性来指定对应的服务降级实现类
package com.bianjf.feign;
import org.springframework.cloud.netflix.feign.FeignClient;
import com.bianjf.common.api.UserServiceAPI;
import com.bianjf.feign.fallback.UserServiceFallback;

/**
* 继承相关的API,而无需编写任何代码
*
*/
@FeignClient(name = "FEIGN-PROVIDER", fallback = UserServiceFallback.class)
public interface UserService extends UserServiceAPI {

}
2.1.5 其他配置
2.1.5.1 请求压缩
Spring Cloud Feign支持对请求与响应进行GZIP压缩,以减少通信过程中的性能损耗。通过以下两个参数,即可进行设置
feign.compression.request.enabled=true
feign.compression.response.enabled=true
以下是几个工程的源码
commonapi.zip
feignconsumer.zip
feignprovider.zip


评论区